6. EasyMini
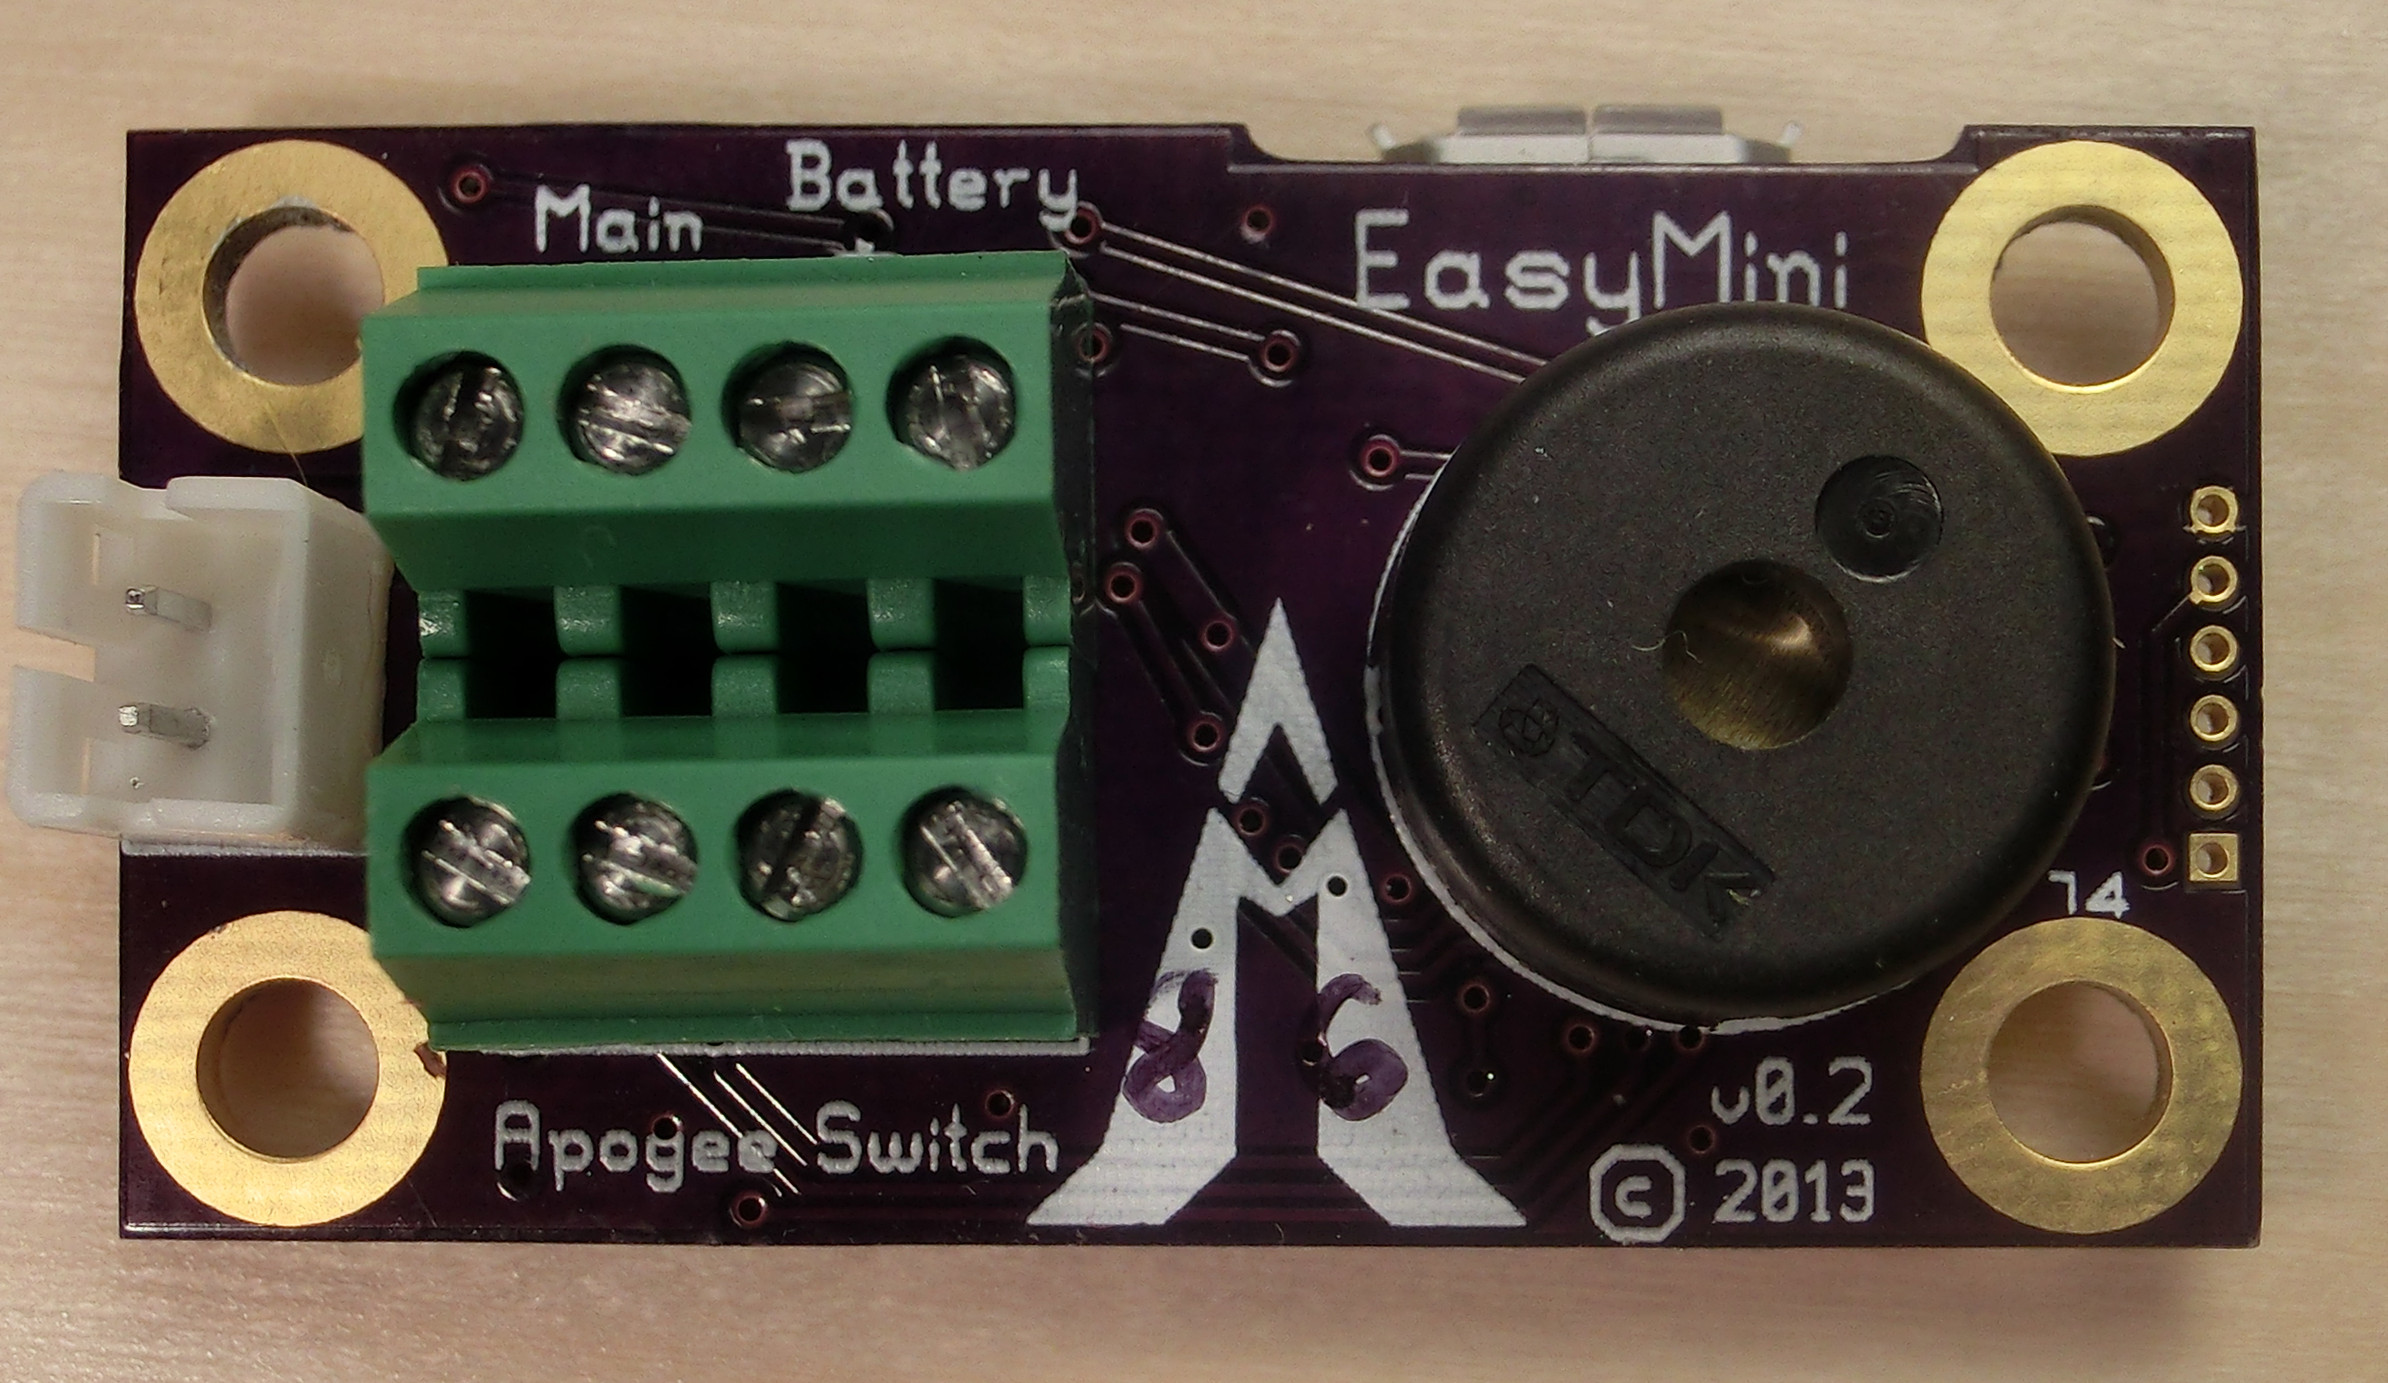
Fig. 6.1 EasyMini Board
EasyMini is built on a 0.8 inch by 1½ inch circuit board. It’s designed to fit in a 24mm coupler tube.
You usually don’t need to configure EasyMini at all; it’s set up to do dual-deployment with an event at apogee to separate the airframe and deploy a drogue and another event at 250m (820ft) to deploy the main. Install EasyMini in your airframe, hook up a battery, igniters and a power switch and you’re ready to fly.
6.1. EasyMini Screw Terminals
EasyMini has two sets of four screw terminals near one end of the board. Using the picture above, the top four have connections for the main pyro circuit and an external battery and the bottom four have connections for the apogee pyro circuit and the power switch. Counting from the left, the connections are as follows:
| Terminal # | Terminal Name | Description |
|---|---|---|
| Top 1 | Main - | Main pyro channel connection to pyro circuit |
| Top 2 | Main + | Main pyro channel common connection to battery |
| Top 3 | Battery + | Positive external battery terminal |
| Top 4 | Battery - | Negative external battery terminal |
| Bottom 1 | Apogee - | Apogee pyro channel connection to pyro circuit |
| Bottom 2 | Apogee + | Apogee pyro channel common connection to battery |
| Bottom 3 | Switch Output | Switch connection to flight computer |
| Bottom 4 | Switch Input | Switch connection to positive battery terminal |
6.2. Connecting A Battery To EasyMini
There are two possible battery connections on EasyMini. You can use either method; both feed through the power switch terminals.
One battery connection is the standard Altus Metrum white JST plug. This mates with single-cell Lithium Polymer batteries sold by Altus Metrum.
The other is a pair of screw terminals marked Battery + and Battery -. Connect a battery from 4 to 12 volts to these terminals, being careful to match polarity.
6.3. Charging Lithium Batteries
Because EasyMini allows for batteries other than the standard Altus Metrum Lithium Polymer cells, it cannot incorporate a battery charger circuit. Therefore, when using a Litium Polymer cell, you’ll need an external charger. These are available from Altus Metrum, or from Spark Fun.
6.4. Using a Separate Pyro Battery with EasyMini
As described in Using a Separate Pyro Battery, using an external pyro battery involves connecting the negative battery terminal to the flight computer ground, connecting the positive battery terminal to one of the igniter leads and connecting the other igniter lead to the per-channel pyro circuit connection.
To connect the negative pyro battery terminal to EasyMini ground, connect it to the negative external battery connection, top terminal 4.
Connecting the positive battery terminal to the pyro charges must be done separate from EasyMini, by soldering them together or using some other connector.
The other lead from each pyro charge is then inserted into the appropriate per-pyro channel screw terminal (top terminal 1 for the Main charge, bottom terminal 1 for the Apogee charge).
6.5. Using an Active Switch with EasyMini
As explained in Using an External Active Switch Circuit, an external active switch requires three connections, one to the positive battery terminal, one to the flight computer positive input and one to ground. Use the negative external battery connection, top terminal 4 for ground.
The positive battery terminal is available on bottom terminal 4, the positive flight computer input is on the bottom terminal 3.
