
Mmuchness (6 inch)
Here are some notes I've taken as I've built my level 3 certification project, "Mmuchness". To be flown on a Cesaroni M 1230 at Oregon Rocketry's "Desert Heat" launch in July 2010.
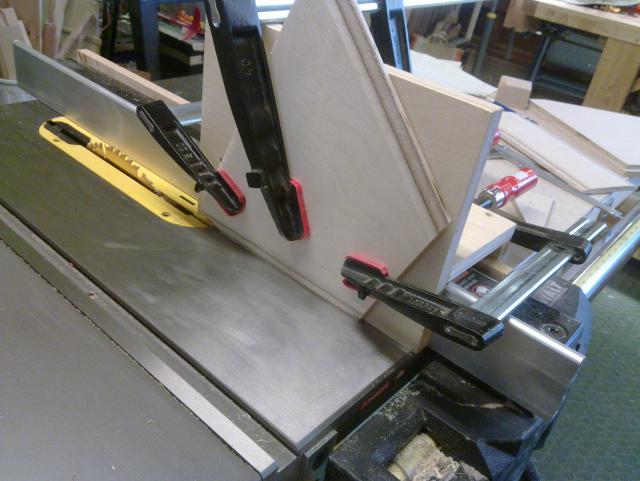
Making the fins
I borrowed a friend's table saw to cut and bevel the fins. After cutting the plywood to size, I screwed three pieces together and cut them to finished shape:
Then, I titled the blade over to 7 degrees and beveled each edge, leaving 1/8" flat on the leading and trailing edges to keep them from getting banged up:
Making the rings
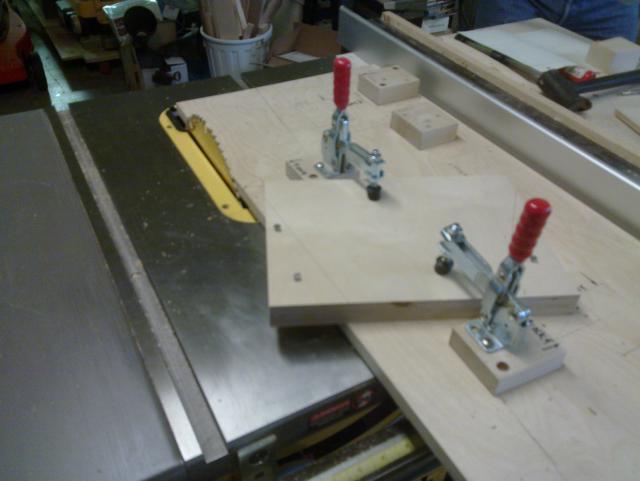
I don't have a fancy CNC mill to cut rings for me, so I built a ring cutting jig for my router table. It's a 12"x12" piece of 1/2" plywood with a 1/8" metal pin in the center and a slot cut from the middle of one side nearly to the center.
Here's a picture of the jig in place on the router table with a 1/4" straight cutting bit in the router.
To make fins with this jig:
- Cut a piece of plywood roughly to shape with a jigsaw
- Drill an 1/8" hole in the center
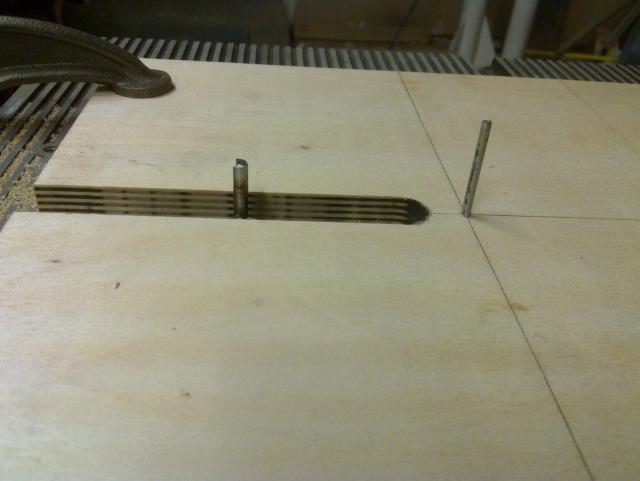
- Align the jig so that the distance from the center of the pin to the inner edge of the router bit matches the radius of the inside of the body tube
- Stick the plywood over the pin
- Turn on the router and plunge the ring over the bit
- Spin the ring around the pin, cutting a neat circle
- Remove the ring
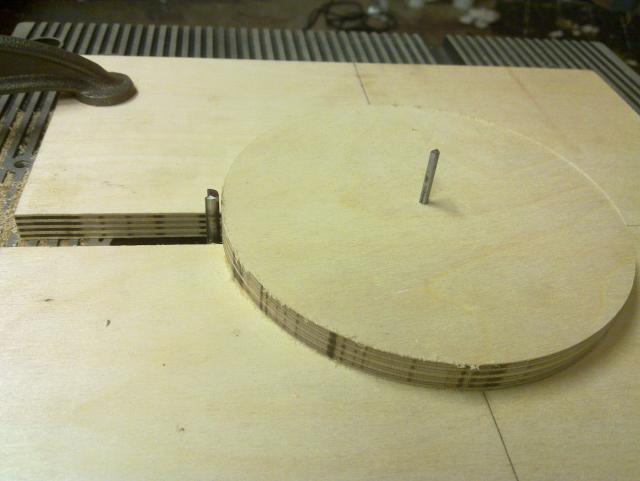
- Align the jig so that the distnace from the center of the pin to the outer edge of the router bit matches the radius of the outside of the motor tube
- Stick the plywood over the pin
- Turn on the router and plunge the ring over the bit
- Spin the ring less than halfway around
- Turn off the router
- Raise the ring off of the bit and rotate it to leave a bit of wood connecting the inner disc with the ring
- Turn on the router and plunge the ring over the bit
- Spin the ring until it's nearly back to the starting point, leaving a short piece connecting the ring and the inner disc on this side too
- Turn off the router and remove the ring
- Cut the connecting pieces, clean up with the dremel


CF on the fins, glass on the ebay bulkheads
To increase fin stiffness and bulkhead strength, I'm applying a layer of CF to the fins and glass on the bulkheads.
I'd love to have a vacuum bagging machine at home, but I don't, so I spread epoxy by hand on the plywood, covered that with the fabric and then squeegied the epoxy through the fabric:

That's just the first side
Cutting the tubing
This design takes 6 pieces of tubing:
- 75mm motor mount 900mm long
- 6" Dynawind fin can 750mm long
- 6" Phenolic coupler 300mm long
- 6" Dynawind body tube 1219.20mm long (4')
- 6" Phenolic coupler ebay 250mm long
- 6" Pheonlic ebay retaining ring 75mm long
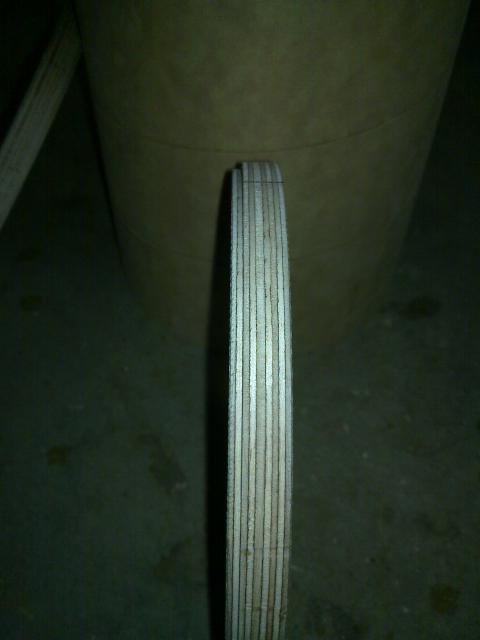
Here's the tubing cut so far:
And here's the rocket dry fit together:
Building the fin can
The fin can is built on a piece of 75mm magnaframe motor mount tubing. It is a zipperless design using a piece of 6" phenolic coupler.
The first task was to attach the two center rings, the one right above the fins and the one right below the coupler. I used JB Weld as the MMT may get hot during motor burn. Here are both rings installed with the mmt upside down. At the top of the picture there is a line on the MMT which will be used to align the fins:
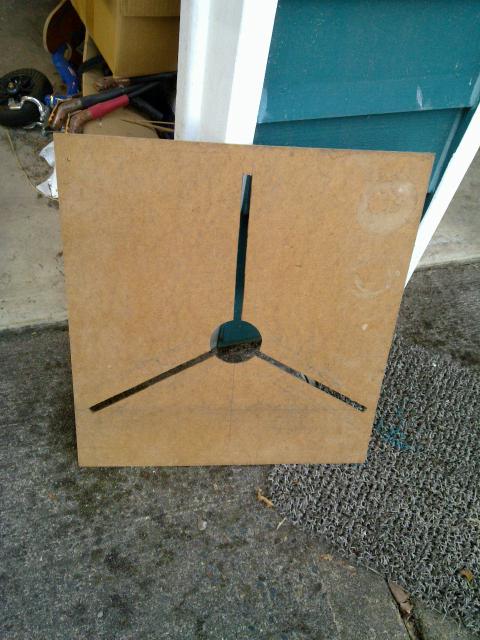
I also cut out a fin alignment jig from hardboard:
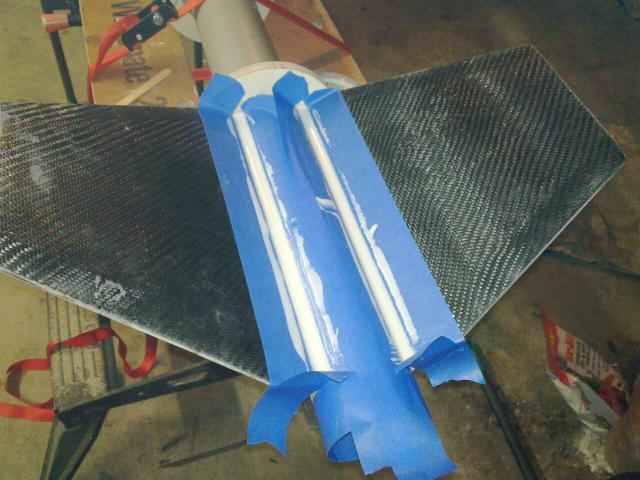
After careful dry-fitting of the fins to make sure everything fit together properly, I glued the root of the fins to the MMT using 15 minute epoxy:

With the fins glued on, I built up some substantial fillets between the fins and the MMT using 15 minute epoxy filled with micro balloons. The glue is just curing in this picture:
With the tape removed, the fillets look reasonably neat:

To securely attach the fins to the mmt, I applied a layer of 6oz glass across the fins and MMT using 15 minute epoxy:
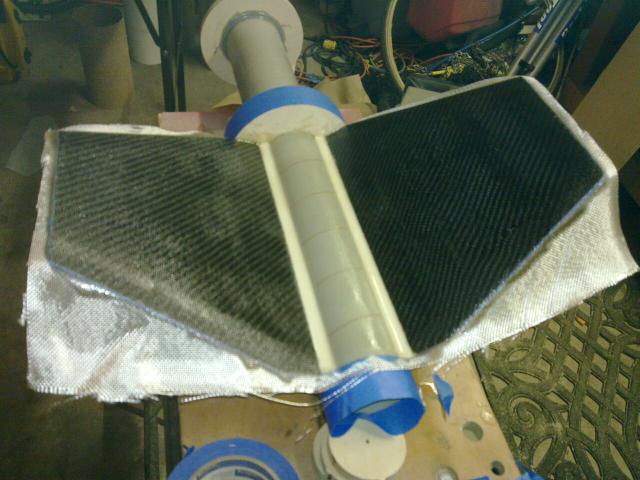
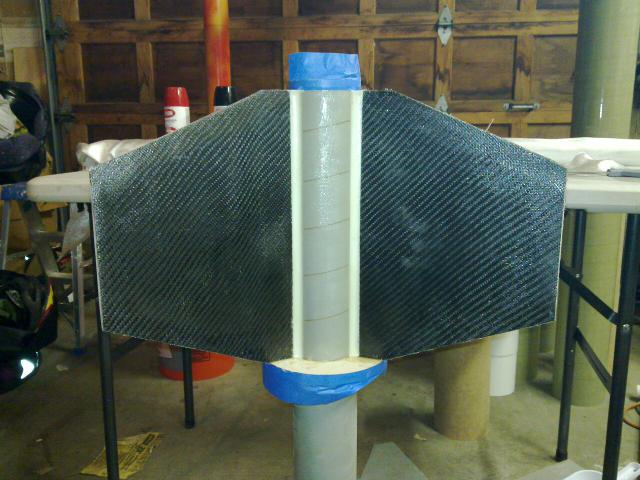
And here's what they look like after the glass has been trimmed:
Lining the coupler with carbon fiber
The coupler piece on the zipperless fin can is lined with carbon fiber to keep the coupler rigid, reducing airframe flexing during flight.
I cut out two pieces of plastic slightly larger than necessary. Then I taped a rectangle on the CF and cut that out to fit precisely within the coupler tube without any overlap. Placing the CF on one piece of plastic, I poured 15 minute epoxy on the CF, layed the other piece of plastic over the top and spread the epoxy evenly through the CF.
Removing the piece of plastic on the bottom (away from the tape), I rolled up the CF/epoxy/plastic and layed it carefully inside the phenolic coupler tube. Then I inflated a 17" balloon to compress the CF against the tubing:
The 17" balloon was a bit too small, so an additional amount of epoxy was applied later near the ends to finish the job.
Attaching the fin can body tubing
Three slots were cut in the fin can section of body tubing using a jigsaw fitted with a metal cutting blade. This then slips over the fins:
And here is the fin can dry-fit together:
Affixing the fin can body tube
With two fins on the inside of the fin can, getting both of those glued at the same time is a bit tricky. Epoxy will be applied to the inner surface of the body tube around the area where the upper ring is attached, then the body tube will be lowered almost all the way on and epoxy will be injected above the lower ring using a syringe:
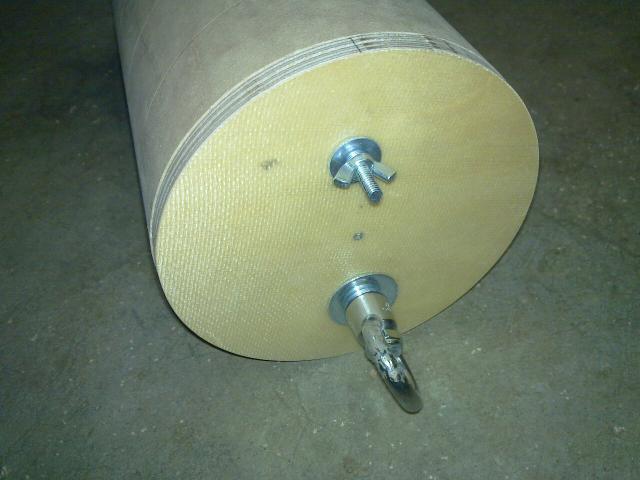
Building the E-Bay
MMuchness uses a slide-in ebay design using a length of 6" coupler tube and two bulkheads. I used my ring cutting jig to make the bulkheads out of 1/2" plywood covered in 6oz glass, making a step in each end to fit into the coupler tube:
And here are the three completed pieces:

The ebay is held together with two pieces of all-thread. One 3/8" length has large eye nuts on each end to attach to the recovery system, the other #10 length has a hex nut on one side and a wing nut on the other:
Here is the assembled ebay:
